Blog 18
Settings Menu
Hardware I used on my Raspberry Pi:
Programmed in:
- bash
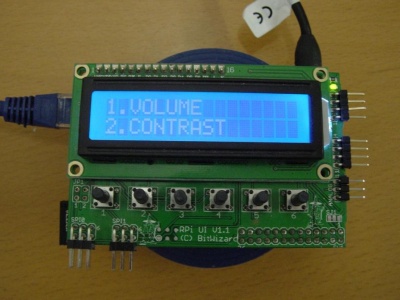
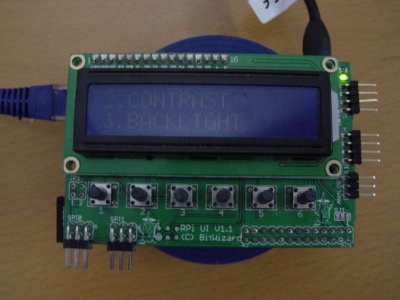
In this post I will show the menu I made, where you can change the: Backlight, Contrast and Volume.
The overall script is based on the scroll menu from blog 13. The menu you can scroll through with button 5(up) and 6(down). On the screen than will be visible which 2 menu you can go to. With button 1 and 2 you can choose which of the 2 you want to edit.
#!/bin/bash

bw_tool -I -D /dev/i2c-1 -a 94 -W 10:00

while true; do
BUTTON=`bw_tool -I -D /dev/i2c-1 -a 94 -R 30:b`

array=(   Volume Contrast Backlight )
# Element 0      1        2

Narray=(  VOLUME CONTRAST BACKLIGHT )
# Element 0      1        2

  if [ $BUTTON  != "00" ]; then
     bw_tool -I -D /dev/i2c-1 -a 94 -W 10:00
  fi

  if [ $BUTTON  = "20" ]; then
     ./${array[$Number]}
  fi

  if [ $BUTTON  = "10" ]; then
    ./${array[$Numb2]}
  fi

  if [ $BUTTON  = "08" ]; then
     Number=0
  fi

  if [ $BUTTON  = "04" ]; then
     exit
  fi

  if [ $BUTTON  = "02" ]; then
     Number=$(((Number + 2) % 3 ))
  fi

  if [ $BUTTON  = "01" ]; then
     Number=$(((Number + 1) % 3 ))
  fi

Numb2=$((Number + 1))
Numb3=$((Numb2 + 1))

bw_tool -I -D /dev/i2c-1 -a 94 -W 11:00
bw_tool -I -D /dev/i2c-1 -a 94 -t "$Numb2""."${Narray[$Number]}
bw_tool -I -D /dev/i2c-1 -a 94 -W 11:20
bw_tool -I -D /dev/i2c-1 -a 94 -t "$Numb3""."${Narray[$Numb2]}

sleep 1

done
Backlight/Contrast
This is the script for changing the backlight. The script for changing the contrast is actually the same. The only difference is that instead of writing to protocol 13 you write to protocol 12. So
bw_tool -I -D /dev/i2c-1 -a 94 -W 13:${array[$Number]}
Has to become
bw_tool -I -D /dev/i2c-1 -a 94 -W 12:${array[$Number]}
#!/bin/bash

bw_tool -I -D /dev/i2c-1 -a 94 -W 10:00

while true; do
BUTTON=`bw_tool -I -D /dev/i2c-1 -a 94 -R 30:b`

array=(   00 19 33 4c 66 7F 99 B2 CC E5 FF )
# Element 0  1  2  3  4  5  6  7  8  9  10

Narray=(   00 10 20 30 40 50 60 70 80 90 100 )
# Name     0  1  2  3  4  5  6  7  8  9  10

 if [ $BUTTON  != "00" ]; then
    bw_tool -I -D /dev/i2c-1 -a 94 -W 10:00
 fi

 if [ $BUTTON  = "04" ]; then
    exit
 fi

 if [ $BUTTON  = "02" ]; then
    Number=$(((Number + 10) % 11 )) # can be changed to 11 if you want it to get 1 down
 fi

 if [ $BUTTON  = "01" ]; then
    Number=$(((Number + 1) % 11 )) #can be changed to 1 if you want to get it up by 1
 fi

bw_tool -I -D /dev/i2c-1 -a 94 -W 11:00
bw_tool -I -D /dev/i2c-1 -a 94 -t "$Numb2"${Narray[$Number]}
bw_tool -I -D /dev/i2c-1 -a 94 -W 13:${array[$Number]}

sleep 1
done
array=(   00 19 33 4c 66 7F 99 B2 CC E5 FF )
# Element 0  1  2  3  4  5  6  7  8  9  10

Narray=(   00 10 20 30 40 50 60 70 80 90 100 )
# Name     0  1  2  3  4  5  6  7  8  9  10
The Array counts in hexadecimals. I want to get 10 steps so people who use it could see it would got from zero to 100. FF is in decimals 255. I just used an easy trick to get one of a tenth of 255. What is 25.5. What is around 19 in hexadecimals. After that I kept counting 19 up the hexadecimal number, until I reach FF. Now it got better steps between the parts.
Volume
The script makes it possible to make the audio 5/10 decibel louder or quieter.
$DISPL -t `amixer | grep Mono: | sed -e 's/%] .*//' -e 's/.* \[//'`
To program will at the end read a which % the audio is of it's maximum. With the grep and sed -e files it only search for the wanted text the full text normally would be without sed -e:
Mono: Playback -600 [91%] [-6.00dB] [on]
After the # I put and audio files, this is optional but there you could put a short audio file. So, that you can directly hear how the loud the audio is.
#!/bin/bash

DISPL="bw_tool -I -D /dev/i2c-1 -a 94"

while true; do
BUTTON=`bw_tool -I -D /dev/i2c-1 -a 94 -R 30:b`

  if [ $BUTTON  != "00" ]; then
     bw_tool -I -D /dev/i2c-1 -a 94 -W 10:00
  fi

  if [ $BUTTON  = "20" ]; then
  amixer -c 0 set PCM 5dB-
  #mplayer ru.mp3
  fi

  if [ $BUTTON  = "10" ]; then
  amixer -c 0 set PCM 5dB+
  #mplayer ru.mp3
  fi

  if [ $BUTTON  = "04" ]; then
  exit
  fi
  if [ $BUTTON  = "02" ]; then
  amixer -c 0 set PCM 10dB-
  #mplayer ru.mp3
  fi

  if [ $BUTTON  = "01" ]; then
  amixer -c 0 set PCM 10dB+
  #mplayer ru.mp3
  fi

$DISPL -W 11:00:b
$DISPL -t `amixer | grep Mono: | sed -e 's/%] .*//' -e 's/.* \[//'`

sleep 1
done

