Difference between revisions of "Connecting FPCs"
Jump to navigation
Jump to search
(Created page with "Connecting an FPC is easy. When you get the camera kit, it will look like this:") |
|||
| Line 2: | Line 2: | ||
When you get the camera kit, it will look like this: |
When you get the camera kit, it will look like this: |
||
[[File:Dsc05937_small.jpg|400px|FPC connector as delivered.]] |
|||
First open up the FPC connector. Use your fingernails or a ballpoint pen (with the ballpoint retracted) to push the (in this case light brown) retention-clip outward: |
|||
[[File:Dsc05938_small.jpg|400px|FPC connector opened up.]] |
|||
Then insert the FPC into the connector. |
|||
[[File:Dsc05939_small.jpg|400px|FPC inserted into the connector.]] |
|||
Note that the connectors may have a small notch protruding from the clip. This prevents the FPC from lying perfectly flat, but does not influence the functioning of the system. If you are bothered by this, you could, at your own risk, remove the notch with a sharp knife. |
|||
Then close the clip: |
|||
[[File:Dsc05940_small.jpg|400px|FPC connector closed.]] |
|||
Done! |
|||
Latest revision as of 10:58, 2 September 2015
Connecting an FPC is easy.
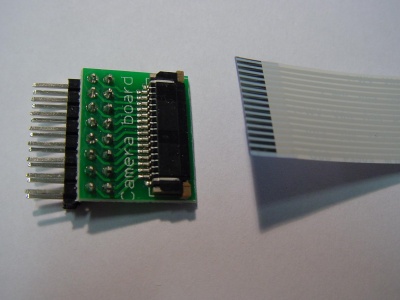
When you get the camera kit, it will look like this:
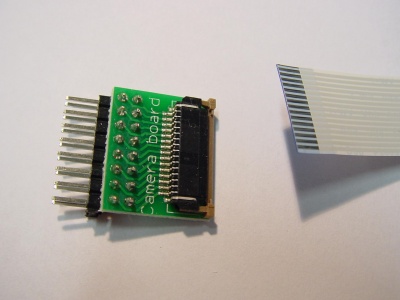
First open up the FPC connector. Use your fingernails or a ballpoint pen (with the ballpoint retracted) to push the (in this case light brown) retention-clip outward:
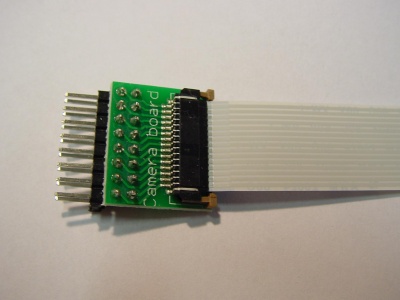
Then insert the FPC into the connector.
Note that the connectors may have a small notch protruding from the clip. This prevents the FPC from lying perfectly flat, but does not influence the functioning of the system. If you are bothered by this, you could, at your own risk, remove the notch with a sharp knife.
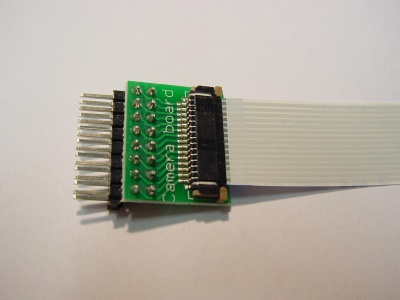
Then close the clip:
Done!


